Sources and views
Under Add item in a collection, select Register source or Create view. Both assets are initially saved at the root of the selected collection and appear in the collection tree, but they do not appear in the central Explorer table.
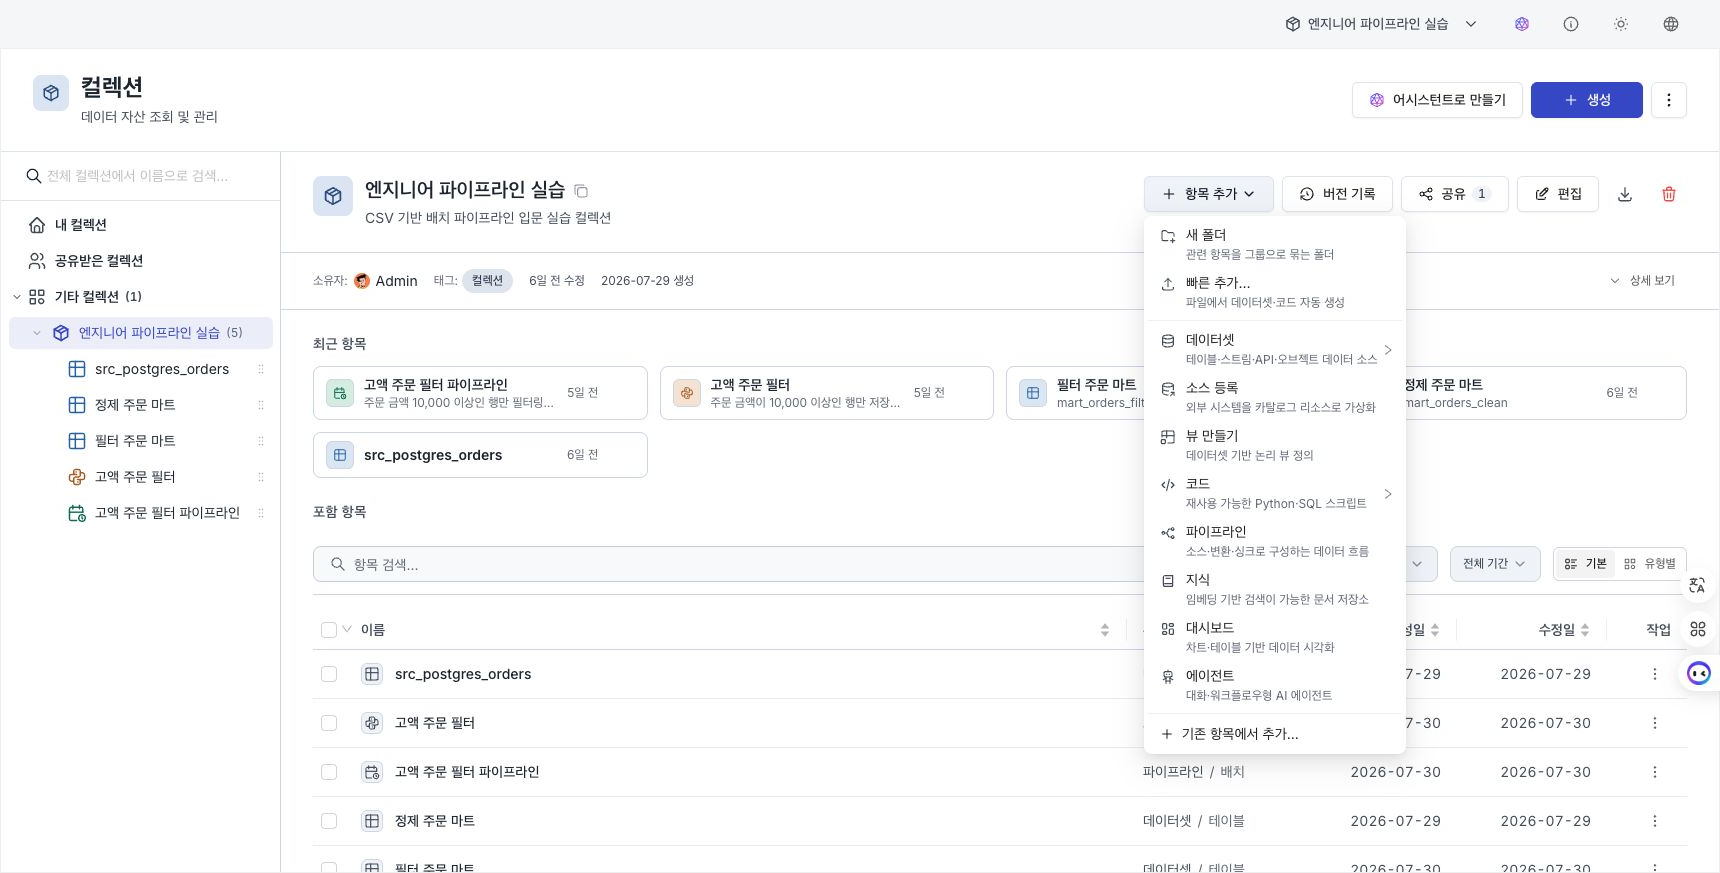
Register a data source
A data source stores an external data location and its read configuration as a collection asset.
- In a collection or folder, select Add item → Register source.
- Select PostgreSQL, MySQL, SQLite, MongoDB, S3, HDFS, Iceberg (S3/HDFS), Delta Lake, or URL as the engine.
- Enter the name, alias, collection, description, and tags.
- Enter required engine-specific options such as address, database, bucket, and path.
- Reference keys in a saved secret instead of entering raw credentials.
- Save, then select the source in the collection tree to review its read-only details.
Even when you start from a folder's create menu, the source is saved at the collection root. To organize it in a folder, drag it in the tree after saving.
Changing the engine also changes the required options. Before saving, review the required fields and secret references for the current engine.
| Engine | Required input | Main optional input |
|---|---|---|
| PostgreSQL | Host, database, table, user | Port (default 5432), password secret, schema |
| MySQL | Host, database, table, user | Port (default 3306), password secret |
| SQLite | DB path, table | — |
| MongoDB | Host, database, collection, user | Port (default 27017), password secret, URI |
| S3 | URI, format | Signed request, access-key secret, compression |
| HDFS | URI, format | — |
| Iceberg (S3) | URL | Signed request, access-key and session-token secrets, format, compression |
| Iceberg (HDFS) | Path | Format, compression |
| Delta Lake | URL | Access-key secret |
| URL | URL | Format, compression |
Create a view
A view limits the rows and columns exposed from a dataset in the collection.
- In a collection or folder, select Add item → Create view.
- Enter the view's name, alias, description, tags, and collection.
- Select the Backing dataset.
- Select output columns and configure any required column masks.
- Enter a filter that limits result rows.
- Review the security warning and save.
A view is also initially saved at the collection root. To move it into a folder, drag it in the tree.
Creating a view requires owner permission on every backing resource. A user who can read the view can see the data exposed through it without permission on the backing resources, so review output columns, masks, and row filters before saving.
The current editor supports a view backed by one dataset. It does not create or edit advanced views based on joins, aggregation, materialization, or data sources.
Where the assets appear
- Sources and views appear in the collection tree and the selected item's details panel.
- They do not appear in the central Explorer table.
- Do not apply the Explorer table's multi-select, move, duplicate, or delete procedures to sources and views. Use the dedicated editor and tree actions for each item.