Explorer navigation and views
Explorer is your single entry point for browsing and managing your collections and all of your assets. Find an asset in the left tree, and view or edit details in the right panel.
Collection range distinction
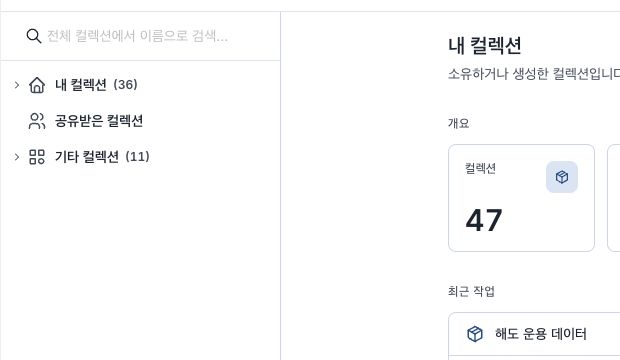
The top left tree shows the collection divided into three scopes.
- My Collection: Collections of which I am the owner.
- Shared Collection: Collections shared with me by other users or groups.
- Other collections (Administrator only, not displayed if not present): Remaining collections visible only with administrator privileges
To the right of each range, a badge indicates the number of collections it contains. You cannot select the range name itself, but continue by selecting the collection below it. For general users, only My collections and Shared Collections are visible, while Other collections appears for administrators only when there are items.
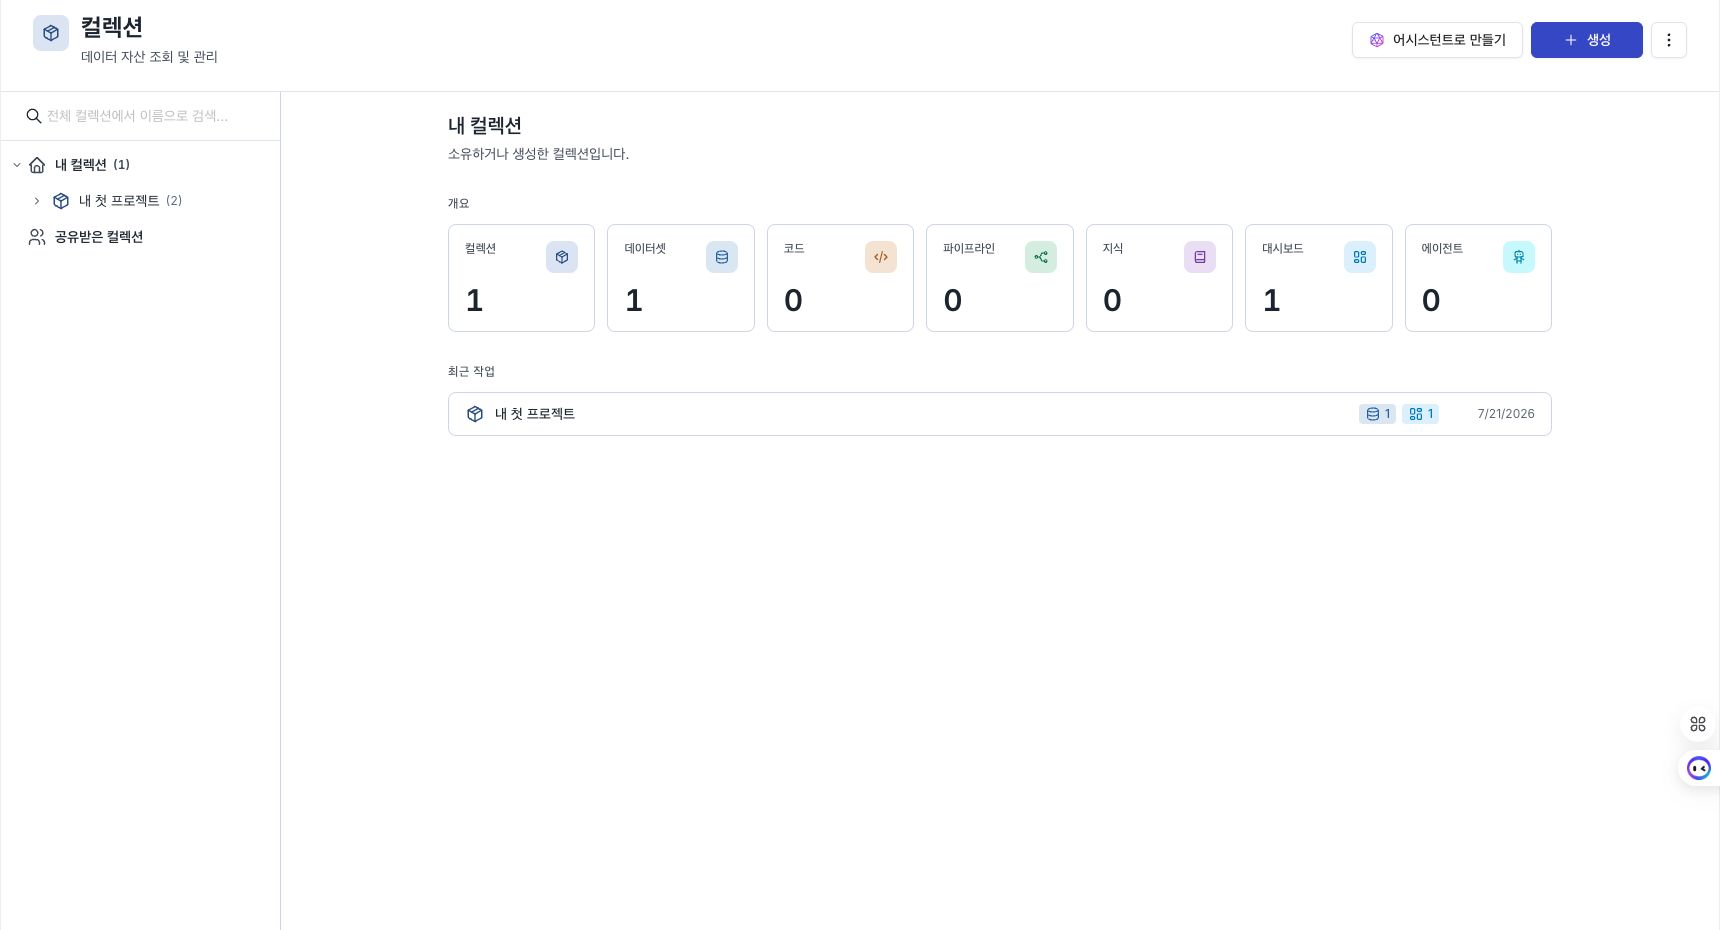
Shortcut to range link (filter mode)
If you add ?scope=my or ?scope=shared to the end of the address, only the collection in that range will be displayed on the screen and the rest will be hidden. You can only use these two values, if you enter any other value it will be ignored and automatically disappear from the address.
- The specified range is automatically expanded.
- A chip containing the current range name, such as
Filter: My Assets ×, appears above the search bar. Pressing this chip will only release the range filter, leaving other states, such as selected assets, intact. - This is convenient when you want to quickly show only a specific range, such as gratitude or link sharing.
Link to selection (?selected=)
When you select a collection or item from a tree or list, the selection is reflected in the ?selected= value in the address bar. Unlike range filters that come on screen and then disappear, the selection status remains on the address.
- Share/Restore: You can copy the address of the item you are currently viewing and forward it or bookmark it. The person who receives the link will immediately open the same item, and the selection will remain the same even if you refresh.
- Automatic expansion of path: When entering a link like this, the path to the target item (range → collection → parent folder) is automatically expanded and the item is highlighted. Even items deep in shared collections or folders can be accessed directly with a single link.
- Address Cleanup: When unchecked, this value will disappear, and unrecognized values, such as already deleted collections, will be automatically cleared and return to the default screen.
- Can be used with range filter (
?scope=). As you move through items, your browser's backlog history won't build up, so your browsing history won't get cluttered.
Collection Tree — Tree Structure
The tree is a mixture of collections → folders / end items (resources placed at the end of the tree). Previously, the tree could only contain folders, but now the following six resources are again displayed as terminal items at the end of the tree.
| Terminal items (6 types) | Do not show in tree |
|---|---|
| Dataset / Code / Pipeline / Knowledge / Dashboard / Agent | Ontological entities/relationships (semantic hierarchy), tools/actors (agent parts) |
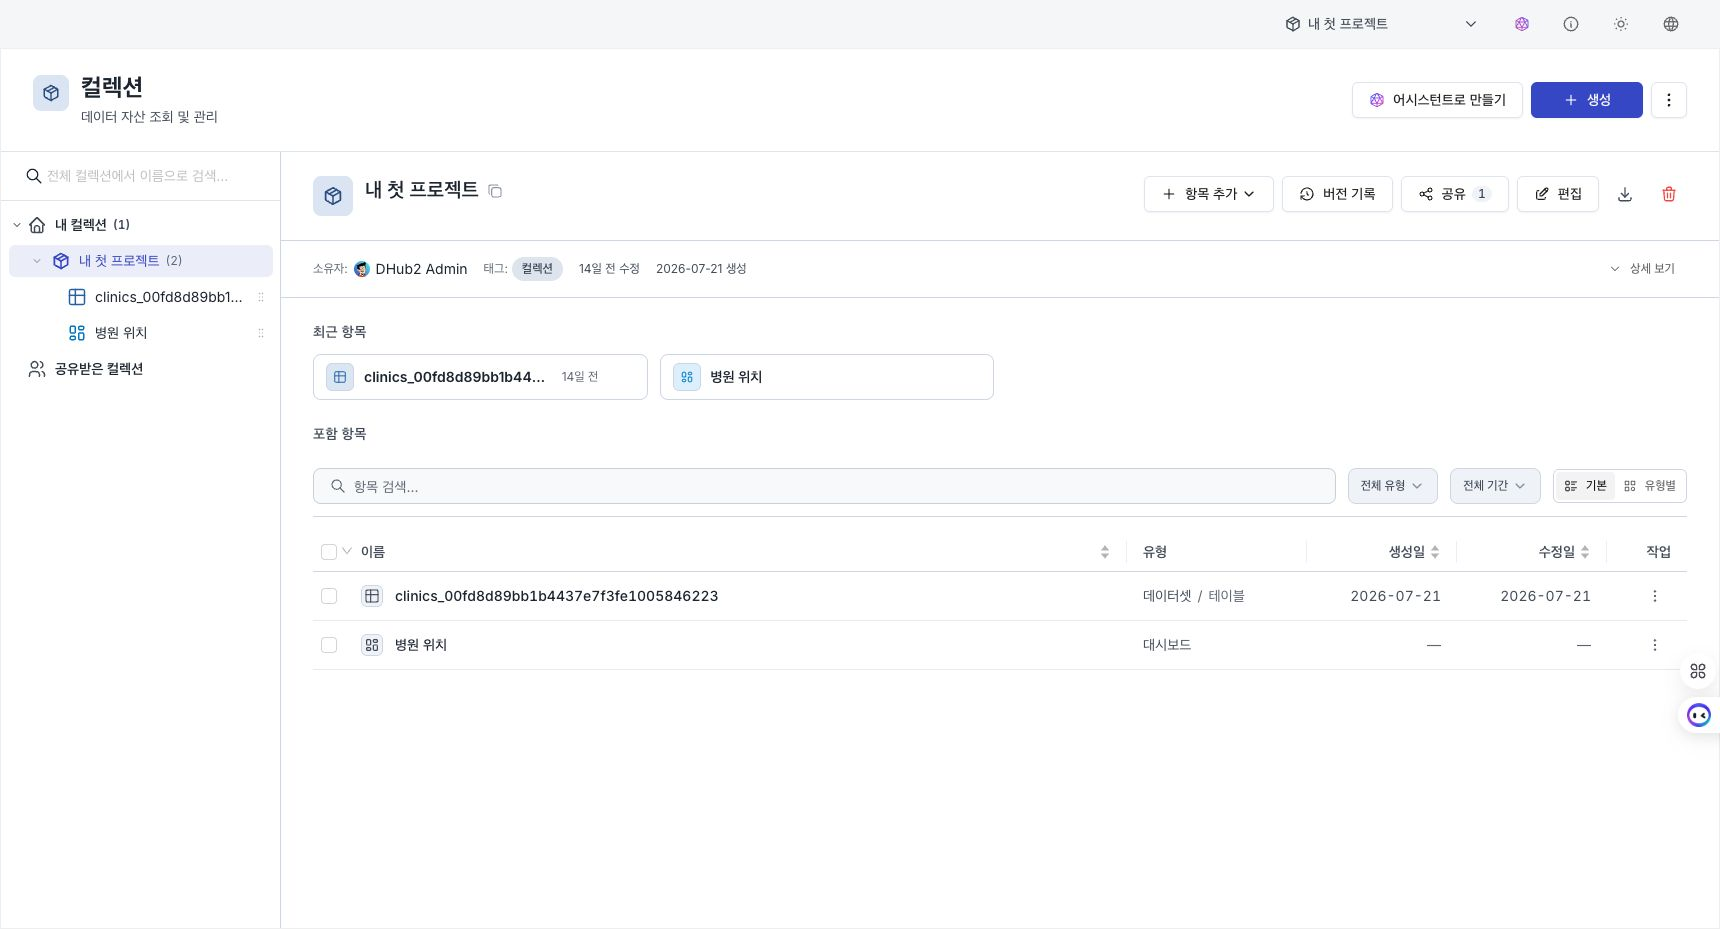
Resource sorting
Resources under a collection or folder are sorted in the following order:
1. Folder       (alias, ascending)
2. Dataset      (alias, ascending)
3. Code
4. Pipeline
5. Knowledge
6. Dashboard
7. Agent
We do not create separate groups for each type. Just sort them so that like types are grouped together, and keep the tree simple (flat).
Count notation (honesty)
- Collection/Folder: The number of items immediately below is displayed as
(N). If there is nothing below it, the expansion arrow (▶) will not appear, so it will not be empty even if you press it. - Folder: The auxiliary notation next to
· Mis the total number of resources under that folder (including subfolders, all 6 types combined). - Terminal items: The number is not displayed.
Row click behavior
| Click Location | Action |
|---|---|
| Collection row | Show collection details panel + expand tree |
| Folder row | Show folder list (folder page) + expand tree |
| Expand arrow (▶) | Expand only (selection does not change) |
| terminal item row | Show detail panel for that resource |
Folder Model
Folders are a tool for organizing resources hierarchically within a collection.
- Resources that can be contained: All 6 types (dataset, code, pipeline, knowledge, dashboard, agent) can be contained.
- Maximum Depth: You can create up to 5 levels of overlap.
- Create: Right-click the collection or folder and select
Create subfolder. There is also a New Folder shortcut in the+ Add item ▾menu in the collection header. - Rename/Move/Delete: You can do this from the menu by right-clicking on the folder. You can move it by dragging and dropping or using
Move to folder…. - Automatic selection: Newly created folders are automatically selected so you can continue working on them right away.
- Permissions: If you set up sharing on a folder, it will be applied to all assets within it at once.
- Move folder to another collection: Not supported. Resources can only be moved one by one.
Show path (breadcrumb): When you select a folder or asset, the collection → folder path is displayed at the top of the screen. If there is an alias, it shows the alias, and if not, it shows the system name.
Folder name rules
| Inspection items | Results |
|---|---|
| Empty name or only spaces | reject |
. or .. | reject |
. is added before and after | reject |
Includes / | reject |
Includes \ | reject |
| Contains control characters | reject |
| invisible special characters | reject |
| Exceeding 255 characters | reject |
| Same name already exists in same collection | reject |
Folder names cannot overlap within a collection. Spaces before and after the name are automatically erased when saving.
Right-click menu (right-click)
Depending on the type of item you select, the menu only shows what you can actually do.
| Item Type | What you can do |
|---|---|
| Collection | Add/Upload/Rename (Alias)/Share/Delete Item |
| folder | Open / Create subfolder / Rename / Move / Share / Delete |
| terminal item | Delete |
You can only delete a terminal item in the tree by right-clicking on it. The rest of the operations, such as open, rename, duplicate, share, and move, are performed from the row menu in the center list. Right-clicking an empty area of the tree does not open a menu.
To copy an entire collection into an independent new collection, select Duplicate from the collection list's action menu. See Duplicate collection for included assets, excluded data, and progress behavior.
Folder Page
When you select a folder, the right screen changes to a list table showing a list of resources directly contained in that folder. It functions like the item tab in the details panel that appears when a collection is selected.
This screen consists of the following order from the top: Filter bar → Batch action bar (appears when you select an item) → Table, and provides the following functions.
- Filter Bar: Provides name search, selection of multiple asset types, and modification date filters.
- Select Multiple: Select multiple assets at once with checkboxes (folder rows are not subject to selection).
- Batch Action Bar: Appears at the top of the table when you select an item, allowing you to move or delete the selected assets all at once. (Sharing is not done from the bulk action bar, but from the right-click menu of individual rows.)
- Table composition: Consists of columns
Name·Type·Created·Modified.NameColumns can be sorted and displayed in up to 50 columns per page. - Detailed Type Badge: The
Typecolumn badge contains subdivisions within the same type (e.g. datasetsdelta/kafka/rest/object, codessql/python). displayed. - Owner Information: There is no separate Owner column in this folder list table. Owners/members and a mouse-over preview can be viewed on the Collection Overview screen that appears when you select a collection.
Grouping by type
The Navigation View Style toggle on the right side of the filter bar allows you to view the list as either Default or By Type.
- Default: Lists all resources in one list.
- By type: Group by type, such as dataset, code, or pipeline, and add a header in the format
Type (N)(type name + number of items) above each bundle. If you click on the header, you can collapse or expand only that group, allowing you to quickly browse through only the types you want in a folder with many resources.
Cross-Collection Move
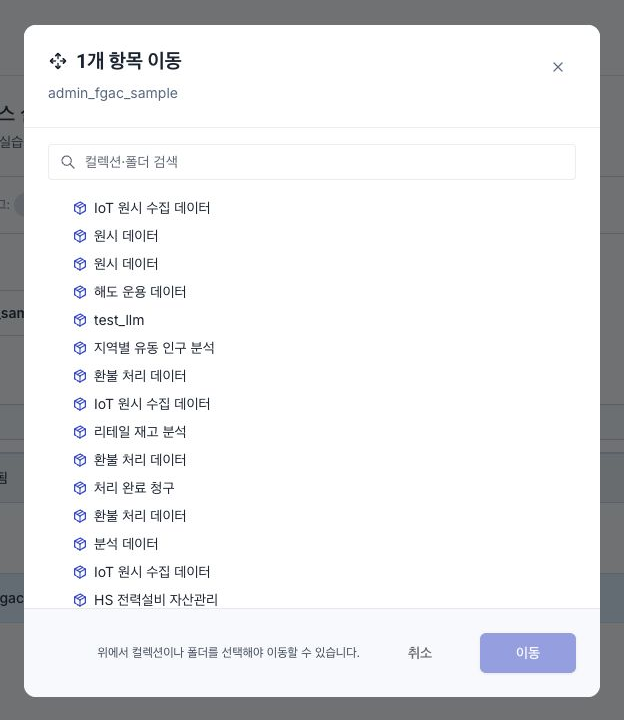
You can move selected assets all at once to another collection or folder.1. Check the assets you want to move in the table, or when moving just one, right-click the row and select Move. (You can also drag and drop resources directly from the tree.)
2. Click Move on the batch task bar, or drag and drop it onto the target folder/collection.
3. Select the location to move to in the Path selection window (searchable Collection → Folder tree). Locations where assets already exist are disabled and cannot be selected (to prevent them from being moved to the same location).
4. Click Move and the assets will be moved one by one. If denied due to lack of permission, the asset will be marked as Failed, and if only some failed, the window will remain and you can try again.
Moving the folder itself to another collection is not supported. It can only be moved on an asset basis.
Global name search
You can find collections and assets by name or alias in the search bar on the left tree, and assets in collections that you do not belong to also appear in the results. The Search… menu (⌘K/Ctrl+K) in the sidebar also uses the same search results.
Browse
If you're new to Explorer, you can take a five-step guided tour by clicking the More (⋯) menu → Browse to the right of the header (next to "Import" in the same menu). The tour points out the main areas of the screen one by one.
- Create a collection — Create button in header
- Navigation tree — Left tree and search
- Type filters — Filter/search bar by type
- Item list — A table of resources for the selected location.
- Detail view — Right detail panel
Tours only open when you run them, they don't pop up on their own. Because there are no collections or the screen is loading, areas that do not exist yet are skipped, and only the areas that are actually visible at that moment are made into steps (on a blank screen, only the creation button and step 2 of the navigation tree are guided). There are always headers and trees, so minimal guidance is always provided.
First startup screen (blank)
When there are no collections, both the center screen and the right panel show the same welcome screen. It provides three-step guidance: "Create workspace → Add assets → Connect operational flow" with the Create collection button.