Modeling
Use Ontology Builder to create and connect entities and relationships. Review the complete structure on the canvas and manage each item's schema and data.
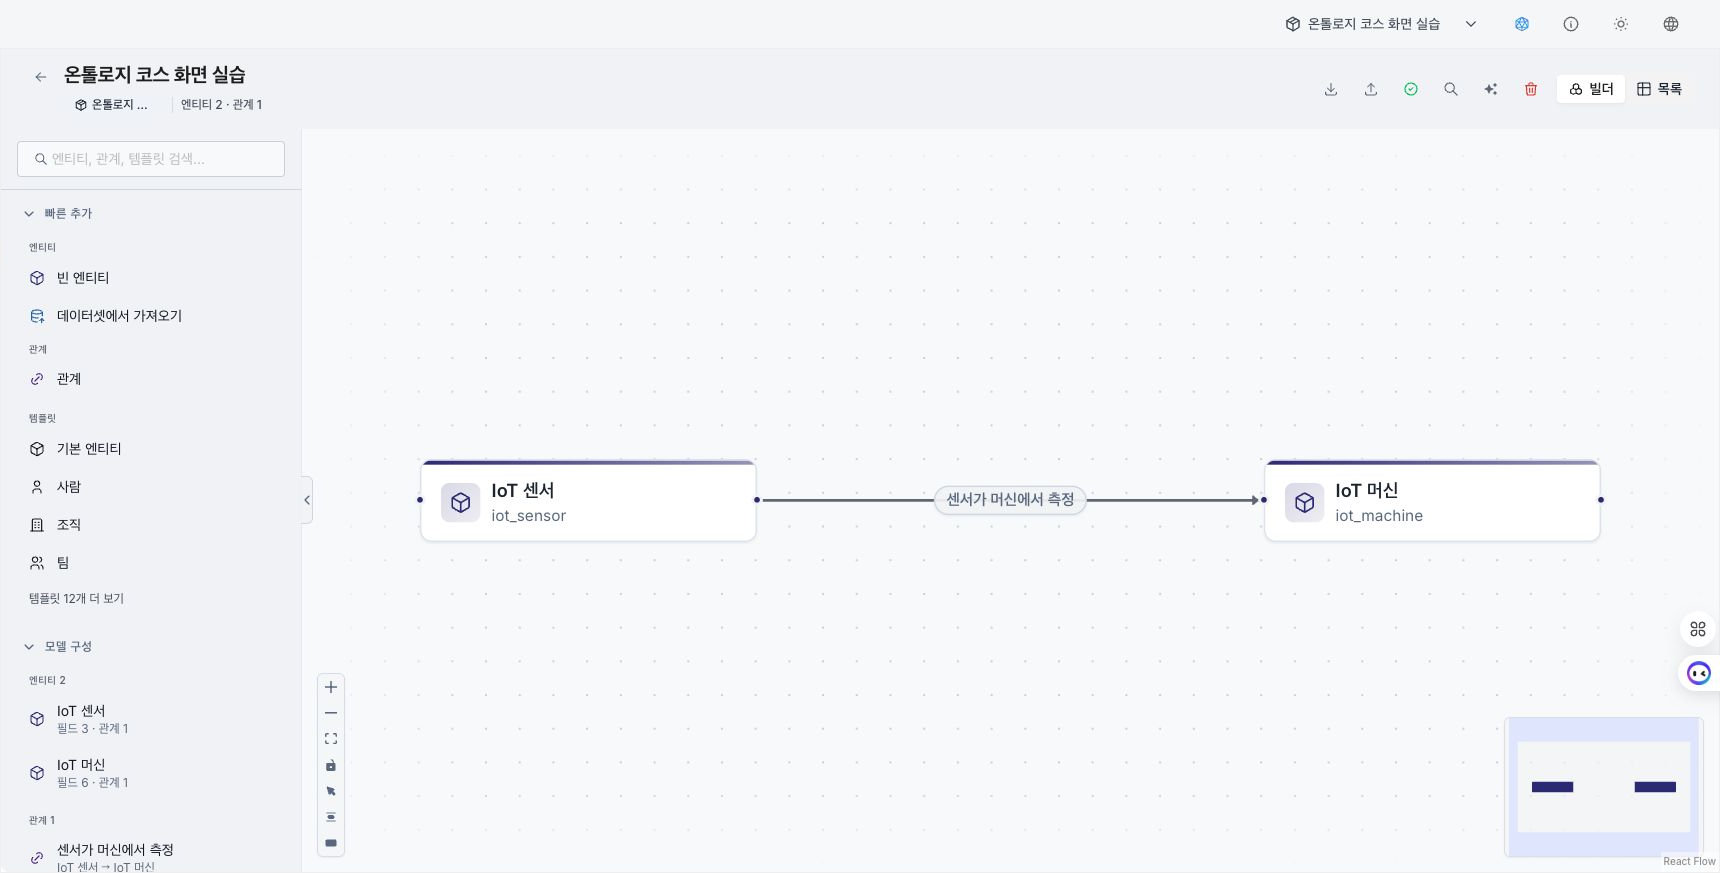
Screen layout
Model structure panel
The left panel shows models by collection and the current model's structure in one tree.
Capture: The model structure panel showing models by collection, the current model's grouped entities, and a collapsible relationship list. Include a read-only entity from another model.
- Collections and models: Select the model to work on. The current model is marked Editing.
- Other models: Expand another model to review its entities. An entity from another model opens as Read only — belongs to another model.
- Entity groups: Entities appear under their assigned groups. Select a group row to narrow the canvas to the group and its connection context. The arrow only collapses or expands the list.
- Relationships: Relationships do not have groups and appear in a separate list rather than under entity groups. Collapse or expand the complete relationship list.
- Templates and quick add: Drag templates such as
Person,Organization, orProductto the canvas, or start from an empty entity or dataset.
Canvas
The canvas is the workspace for placing entities and connecting relationships.
- Move: Drag a node to the required location.
- Connect: Drag a node's connector handle to another node to open the create-relationship dialog.
- Zoom: Use the mouse wheel or on-screen controls.
- Auto layout: Arrange nodes automatically from the top menu.
- Highlight a relationship: Hover over or select an edge to highlight it and both endpoint entities. Other relationships connected to the same entity are shown lightly; remaining items are dimmed.
- View an entity group: Select a group in the model structure panel to show its entities with connected relationships and counterpart entities. Select Clear group scope to show the complete model again.
- Collapse paths: Hide the intermediate entity and component relationships of a Through an intermediate entity relationship to view the derived relationship as one hop. An intermediate entity with other connected relationships remains visible.
- Assign groups in bulk: Select several entities, then choose an existing group or New group… under Assign group. If some saves fail, successful changes remain and the failure count is shown.
Properties panel
The panel on the right edits details for the selected entity or relationship.
- Name display: The properties panel and node use the alias as the primary name and the system name as a secondary name. Without an alias, only the system name appears.
Search
- Search model structure: Find entities, relationships, and templates from the search field in the left panel. Search narrows the panel list without changing the selected group scope.
- Search the current canvas: Press
⌘F(macOS) /Ctrl+F(Windows) to find entities and relationships in the current model. - Open global search: Press
⌘K(macOS) /Ctrl+K(Windows) to find entities and relationships in other models and other assets. Select a result to open its modeling location.
Validation
Select Model quality diagnostics at the top to inspect the current model's entity and relationship structure. Error includes duplicate entity names and duplicate relationships between the same source and target. Warning includes isolated entities and cyclic paths. Info includes self-referential relationships and entities without aliases. Select an item to focus its node or edge on the canvas. These are structural quality signals; they do not validate data rows, schema-save requests, or pipeline executions. A model must be selected.
Create an entity
- Use a template: Drag a template from the left panel to the canvas.
- Create directly: Right-click empty canvas or select Create entity at the top.
- Configure: Define and save the name, description, and properties (columns).
After creation, assign one or more groups under Group on the Overview tab. An entity with several groups appears under each one in the model structure panel.
Configure a relationship
- Hover over a connector handle on the source entity border.
- Drag it to the target entity.
- In the Create Relation dialog, enter and save a name such as
purchasedorworks_for.
Identity key and display column
The properties panel for an entity or relationship contains Identity key and Display column settings.
- Identity key: Columns that uniquely identify each entity item. Configure them to create an entity and use it as pipeline input or output. A relationship's own schema and identity key are optional; the endpoint entity keys are used when creating it.
- Display column: A column used as the representative name in global search, traces, and the properties panel. Without one, the system name is shown.
See Edit a schema for field types and constraints.
Load data
Review current data on an entity or relationship's Data tab. Upload CSV, JSON, or Parquet from the toolbar, or connect code-node output to an entity or relationship in a pipeline.
Pipeline connections do not compare schemas or map fields automatically. Make output column names and types match the target ontology schema. See Connect nodes for connection steps.
Reset one table versus the complete model: Initialize table on an item's Data tab deletes loaded rows for that type and retains the definition. Reset ontology data at the top of Modeling deletes every relationship type in the current model first, then its entity types. Other models in the same collection remain.
To reset the complete model, first review the entity and relationship counts and names, enter the displayed model name exactly, and select Start bulk deletion. This action cannot be undone. While it is Pending or Running, creation, editing, and deletion in the model are locked. The status banner shows total work, completed relationships and entities, the current item, failures and skips, and the Complete / Partially complete / Failed / Canceled state. If another session already started a job, the page resumes that status instead of starting another. Select Refresh list afterward to review remaining items.
AI generation
Select an entity or relationship and then select Generate description with AI in the properties panel. Review the generated description before saving it.
When the current model has at least two entities, select AI: Suggest relationships at the top. During the request, the model and entity count and Generating AI relationship suggestions are shown; select Stop relationship suggestions to cancel. In the result dialog, review source entity, relationship name, target entity, and description, then search or select by source or all. Existing duplicates are excluded. Select Create N relationships to create only selected suggestions. The completion notice reports success and failure counts, and successful relationships remain after a partial failure.
Versions and collection membership
- Version history: Every change appears in the version timeline. It is read only and is not restored like a general asset. See Version history for differences by asset.
- Collection membership is required: Specify a collection when creating or moving an entity or relationship. A builder opened from the collection tree applies that collection automatically.
Export and import
Export ontology definitions to a file or import an external file.
- Export (JSON): Save the current model's entities, groups, relationships, storage modes, cardinality, and property schemas.
- Import (JSON or TTL/Turtle): Import JSON definitions or Turtle (TTL/RDF). OWL classes become entities, data properties become entity columns, and object properties become relationships.
rdfs:labelbecomes the alias andrdfs:commentbecomes the description.owl:cardinality 1and supported maximum-cardinality constraints are applied to relationship cardinality. - Automatic target model: Imported items enter the currently selected model. Existing entities or relationships with the same name are skipped. A relationship via an intermediate entity is created after its component relationships.
- Review losses and errors: The completion result separately lists properties without a known target, relationships whose endpoint entities were not found, and unsupported axioms. Distinguish file-structure errors from individual-item failures.
- Progress: During import, review Validation → Entities → Relationships → Refresh with
Processed / Totaland the current item name.
Self-referential relationships
An entity can relate to itself. For example, the manages relationship of Person can point to the same Person entity.
Keyboard shortcuts
| Shortcut | Action |
|---|---|
Delete / Backspace | Delete selected items |
⌘Z (macOS) / Ctrl+Z (Windows) | Undo |
⌘Shift+Z (macOS) / Ctrl+Shift+Z (Windows) | Redo |
⌘A (macOS) / Ctrl+A (Windows) | Select all |
Space | Switch to pan mode |
V | Switch to selection mode |
Select the ? icon at the top to view all shortcuts.
Practical example
- COVID-19 regional analysis — from neighborhood population to movement hot spots and a regional ontology — A 90-minute workshop using synthetic neighborhood data to build a regional epidemic-monitoring graph.