Configure a connector
Configure connection information and usage permissions for a new connector. For an existing connector, change values and use Test connection to check connectivity.
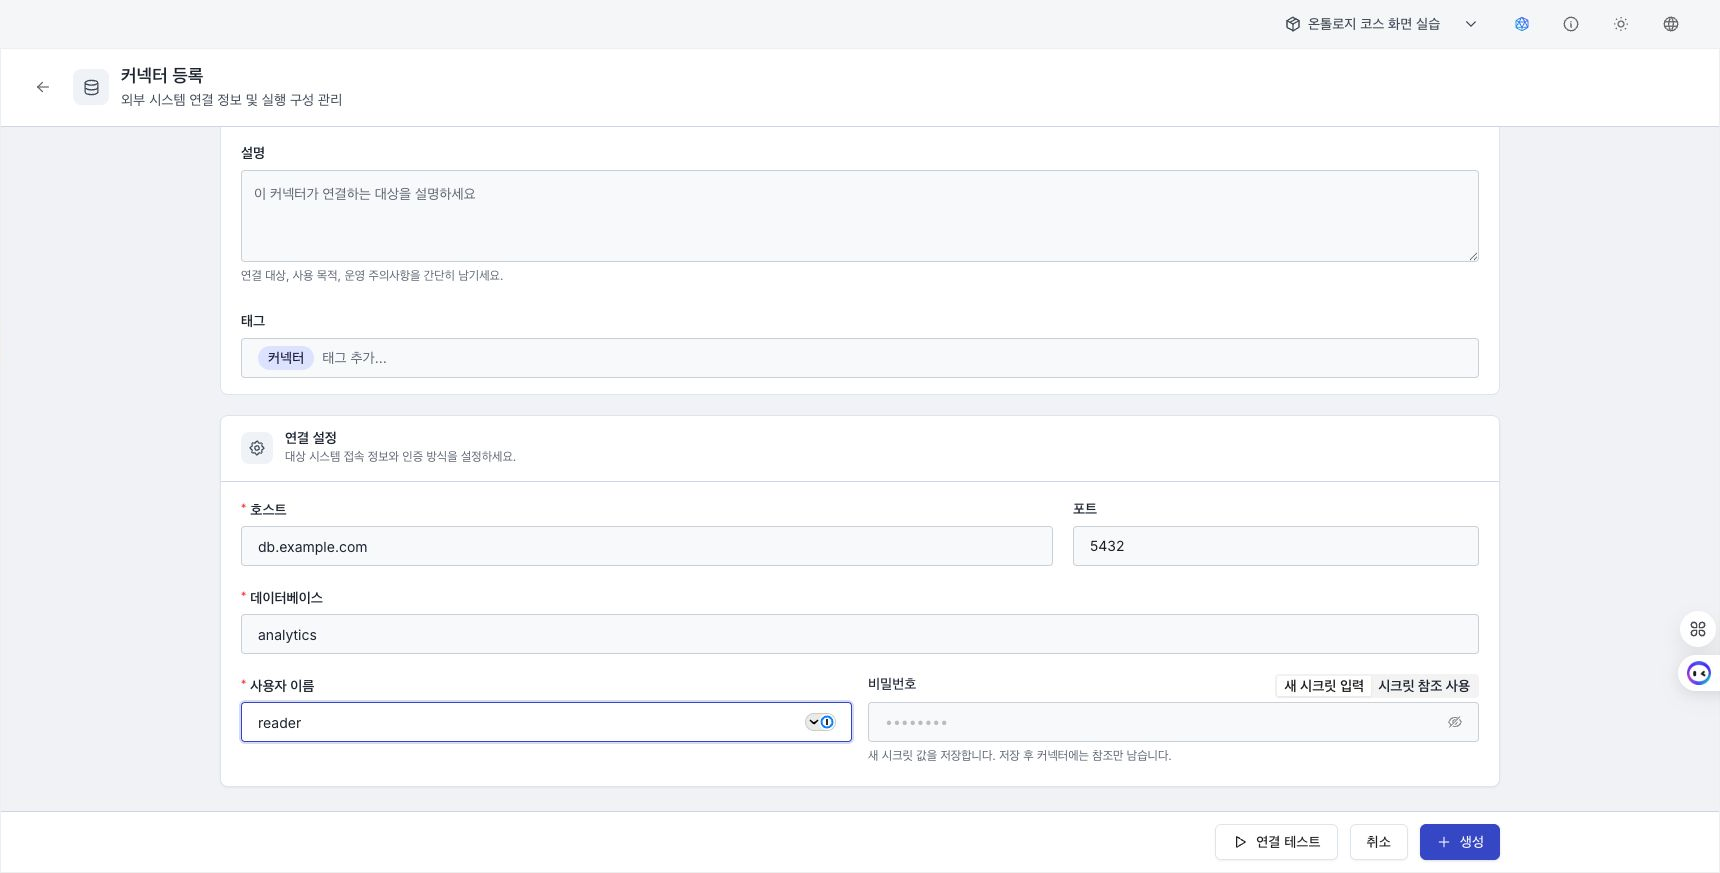
Registration flow
- Select Register connector at the top right of the Data Connection list page.
- The edit page (
/connectors/new) opens. - Choose a type and template, complete the basic information and connection settings, and select Create.
Only users with the Admin (admin) or Manager (manager) type can create connectors. Without permission, a banner appears at the top of the screen and all inputs are locked as read only.
Edit screen layout
The edit screen is divided into tabs.
| Tab | Contents |
|---|---|
| Basic Information | Type and template selection during creation, plus name, alias, collection, description, and tags |
| Configuration | Connection settings, plus the script and required packages for a custom connector |
| Use permissions | Available only while editing; manages users and groups allowed to run the connector |
The bottom of the screen contains Test connection / Cancel / Save (or Create) buttons.
Basic Information tab
Select a type and template during creation
When creating a connector, first choose a type and then a template.
- Under Select connector type, choose Database, Graph, REST API, S3 Storage, Vector DB, or MCP Server.
- Choose a built-in template for that type or choose Custom. Selecting Custom lets you write the connector script yourself.
A built-in template prepares a form for that type automatically. A custom template also displays the connector script editor.
Common information
After selecting a type and template, enter the following metadata.
| Field | Description |
|---|---|
| Connector name | System identifier. Must begin with a lowercase letter and contain only lowercase letters, numbers, and underscores (_), up to 128 characters. It cannot be changed after creation. |
| Alias | Optional display name. If left blank, it is set to the name. |
| Collection | Required collection context in which the connector runs. |
| Description | Free text describing the target, purpose, or operational considerations. |
| Tags | Tags used for search and classification. |
After entering a name, the sparkle (✨) icon is enabled next to Alias, Description, and Tags. Select the icon to receive an AI suggestion.
Configuration tab — Connection settings
The connection settings form matches the selected type and template.
Database (Ontology Store or Data Hub)
- Host / Port: Connection host and port. The default is 5432 for Ontology Store and 8123 for Data Hub.
- Database: Database name.
- Username / Password: Authentication credentials.
- A managed PostgreSQL data connection also provides SSL mode and Connection timeout. Choose the SSL mode required by the server and enter the timeout in seconds.
- Secure connection: For Data Hub, enables or disables a secure connection.
Graph (Graph Store)
- URI: Connection address, for example
bolt://graph.example.com:7687. - Username / Password: Authentication credentials.
REST API
- Enter the target endpoint in Base URL. This field is required and validated as a URL.
- Authentication query parameter: Optional query parameter name used to send an authentication key. Use it for APIs that accept a key in the URL query, such as
serviceKeyorauthKey. Leave it blank if the connector script sets the parameter itself. - Service key (authentication key): Value sent through the preceding query parameter. It is stored as a secret like a password or API key. After saving, only the reference remains and the value is not shown again. See Enter secrets.
- Enter the call limit in milliseconds under Timeout.
- Use SSL verification to choose whether SSL certificates are verified.
- Allow console writes is disabled by default. Enable it only when the REST API Query Console must run
POST,PUT,PATCH, orDELETErequests.
S3 Storage
- Endpoint URL: S3 endpoint, for example
https://s3.amazonaws.com. - Access key / Secret key: Credentials.
- Region / Default bucket: Optional region and default bucket.
Vector DB (Vector Store)
- URL: Required connection address, such as
http://qdrant.example.com:6333. The URL format is validated. - API key: Optional authentication key. It is stored as a secret and only its reference remains after saving.
- Timeout (ms): Call limit in milliseconds.
MCP Server
Select MCP Server under managed technologies to connect a Streamable HTTP MCP server without writing code.
- URL: The MCP server's
httporhttpsaddress. - Headers: Add HTTP header names and values required for authentication or routing. Use secret input for authentication values.
- Timeout: The number of seconds to wait for a server response. It must be greater than zero.
After the connection test succeeds, open AI > Tools and run Import from MCP. See Import tools from an MCP server to select remote tools and review schema changes.
REST API, S3, Vector, and the built-in templates for Data Hub, Ontology Store, Graph Store, and Vector Store provide the forms described above. Custom Database and Graph connectors do not have a predefined form, so enter connection options directly in the JSON editor.
Enter secrets
Use one of two methods for secrets such as passwords, access keys, secret keys, API keys, and service keys.
- Enter new secret: Enter the value directly. After saving, only reference information remains on the connector screen and the value is not displayed again.
- Use secret reference: Specify a stored secret by its reference path, for example
secret://connector/connector.x/password.
See Secrets to create an independent secret, rotate keys, and manage use permissions.
Configuration tab — Custom connector script
When creating or editing a custom connector, write the connection logic and behavior in the script area.
- Connector script: Write Python code in the editor. The required functions are listed above the editor and differ by connector type.
- Required packages (collapsed by default): Add Python packages used by the script, including versions, for example
psycopg2-binary>=3.0. This list is only a reference when building the Docker image; packages are not installed automatically at runtime.
Save and test the connection
- Test connection: Connects to the target system with the information currently entered on the edit screen. If an existing connector retains a saved secret reference, that reference is used. The result shows success or failure and elapsed time.
- Tests on read-only and built-in connectors: Connection testing follows execution permission, not edit or save permission. You can therefore test from the edit screen of a read-only or built-in connector. Only Administrators can test built-in connectors; Administrators and Managers can test custom connectors.
- Save / Create: After input validation passes, the connector is saved and the list reopens. If validation fails, the screen automatically switches to the tab containing the invalid field.
REST API Query Console
Select Query Console from a REST API connector card's action menu or open the Query Console tab on its details screen. You need both an Administrator or Manager role and use permission on the connector.
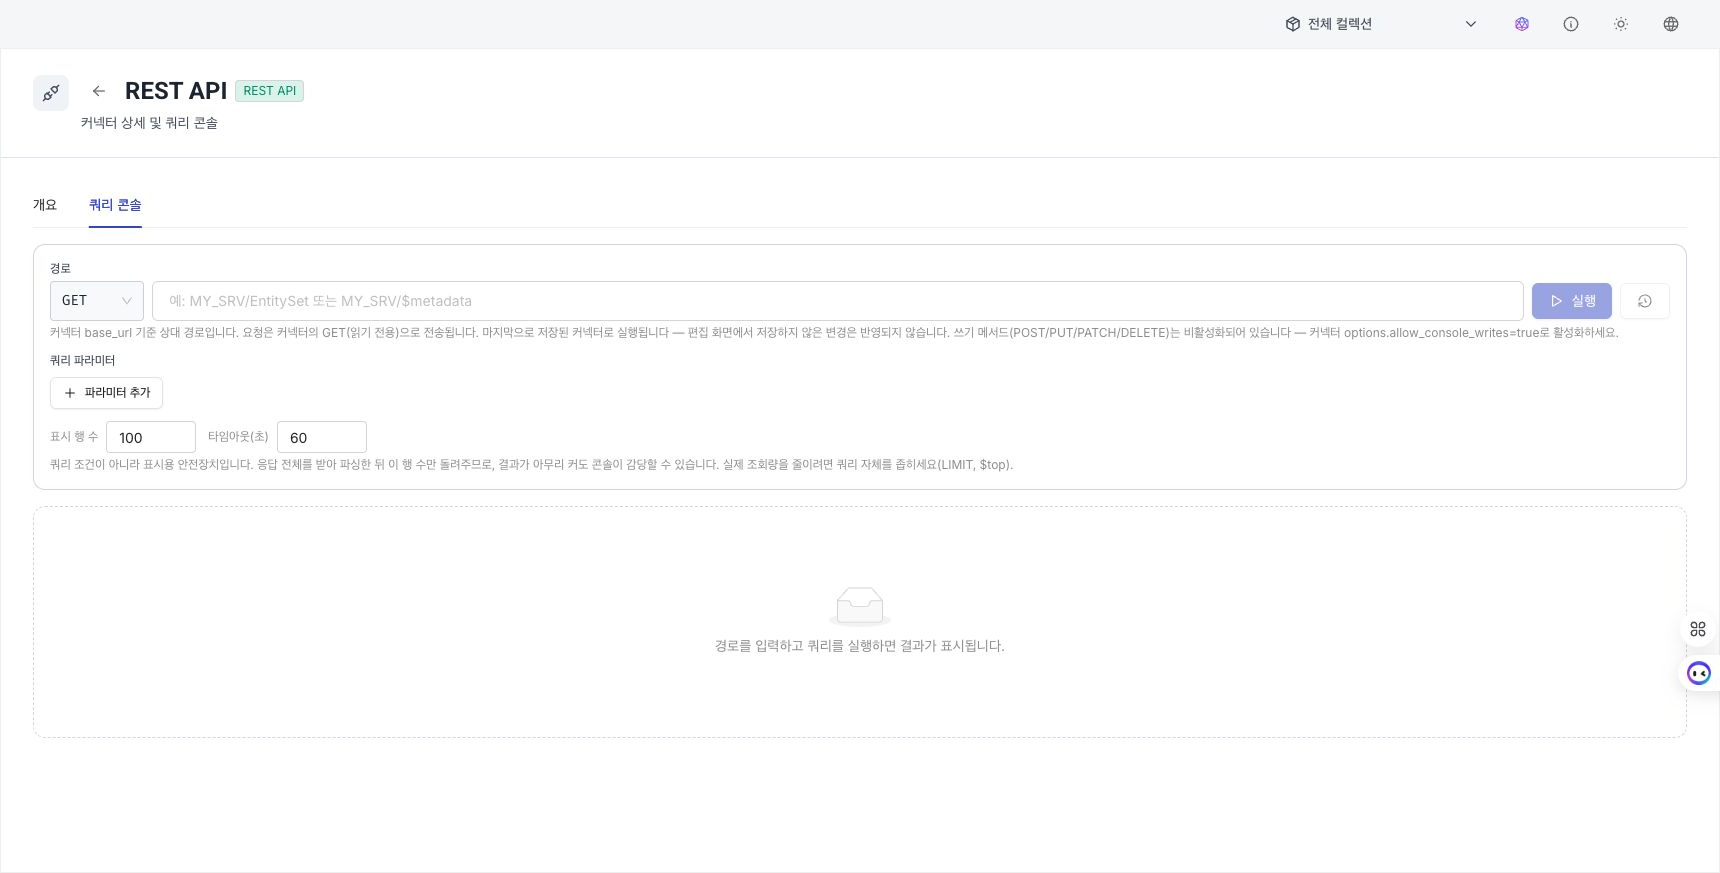
The console uses the last saved connector configuration and credentials, not unsaved values in the editor. Save configuration changes first.
Run a read request
- Select
GETand enter a path relative to the base URL. - Enter
:namepath parameters and any required query parameters. - Enter a row limit from 1 to 10,000.
- Review or copy the completed request URL, then run it.
Run a write request
POST, PUT, PATCH, and DELETE are enabled only when Allow console writes is enabled in the connector settings. You can enter a JSON request body for POST, PUT, or PATCH. Do not apply the body procedure to DELETE.
Before execution, a confirmation dialog shows the method and complete URL. Review the update or deletion impact before continuing. The server checks the write setting again.
Review results and request history
- Review status code, Content-Type, displayed body size, duration, row count, and whether results or raw content were truncated.
- When rows are available, Table opens by default. When only a body is available, Body opens by default.
- From Table, export only the currently displayed results as CSV. If results were truncated by the row limit, a notice explains that the file contains the current rows, not the full response.
- Under Body, detect JSON, XML, HTML, YAML, or text automatically, or select a format. Switch between Formatted / Raw, then copy the raw content or save it with the appropriate file type.
- Under Request / Response, review recorded methods, URLs, HTTP status, and headers as structured fields or raw messages. Raw messages are reconstructed from recorded metadata, and request bodies are not recorded.
- HTTP errors also show status code, headers, and body in the result area.
- A successful request's method, path, parameters, body, and row limit are stored in browser history for this connector and can be loaded again.
Use saved secrets for credentials. A password or API key entered directly in a path, query parameter, or JSON body can remain in browser request history.
Use permissions tab while editing
Use the Use permissions tab of an existing connector to manage users and groups allowed to run it. See Use permission under Sharing permissions for the difference from Owner, Editor, and Viewer roles.
- Grant usage permission: Search for a user or group and add execution permission.
- Collection prerequisite: To run a connector in a collection, the target must own the collection or have use permission on it. If the current account can manage collection permissions, the portal first grants use permission on the parent collection automatically. Otherwise, connector use permission can be granted only to targets that already meet the prerequisite.
Delete a connector
Delete a custom connector with card menu (⋮) → Delete in the list. The action is visible only to Administrators and Managers. Built-in connectors cannot be deleted. Selecting Delete opens a confirmation dialog.
Before restoring connector settings, review the preview and restoration scope and downstream impact under Version history.