Workflow Editor
This guide introduces the interface and key features of the pipeline editor.
Screen Layout
[Screenshot] Workflow editor
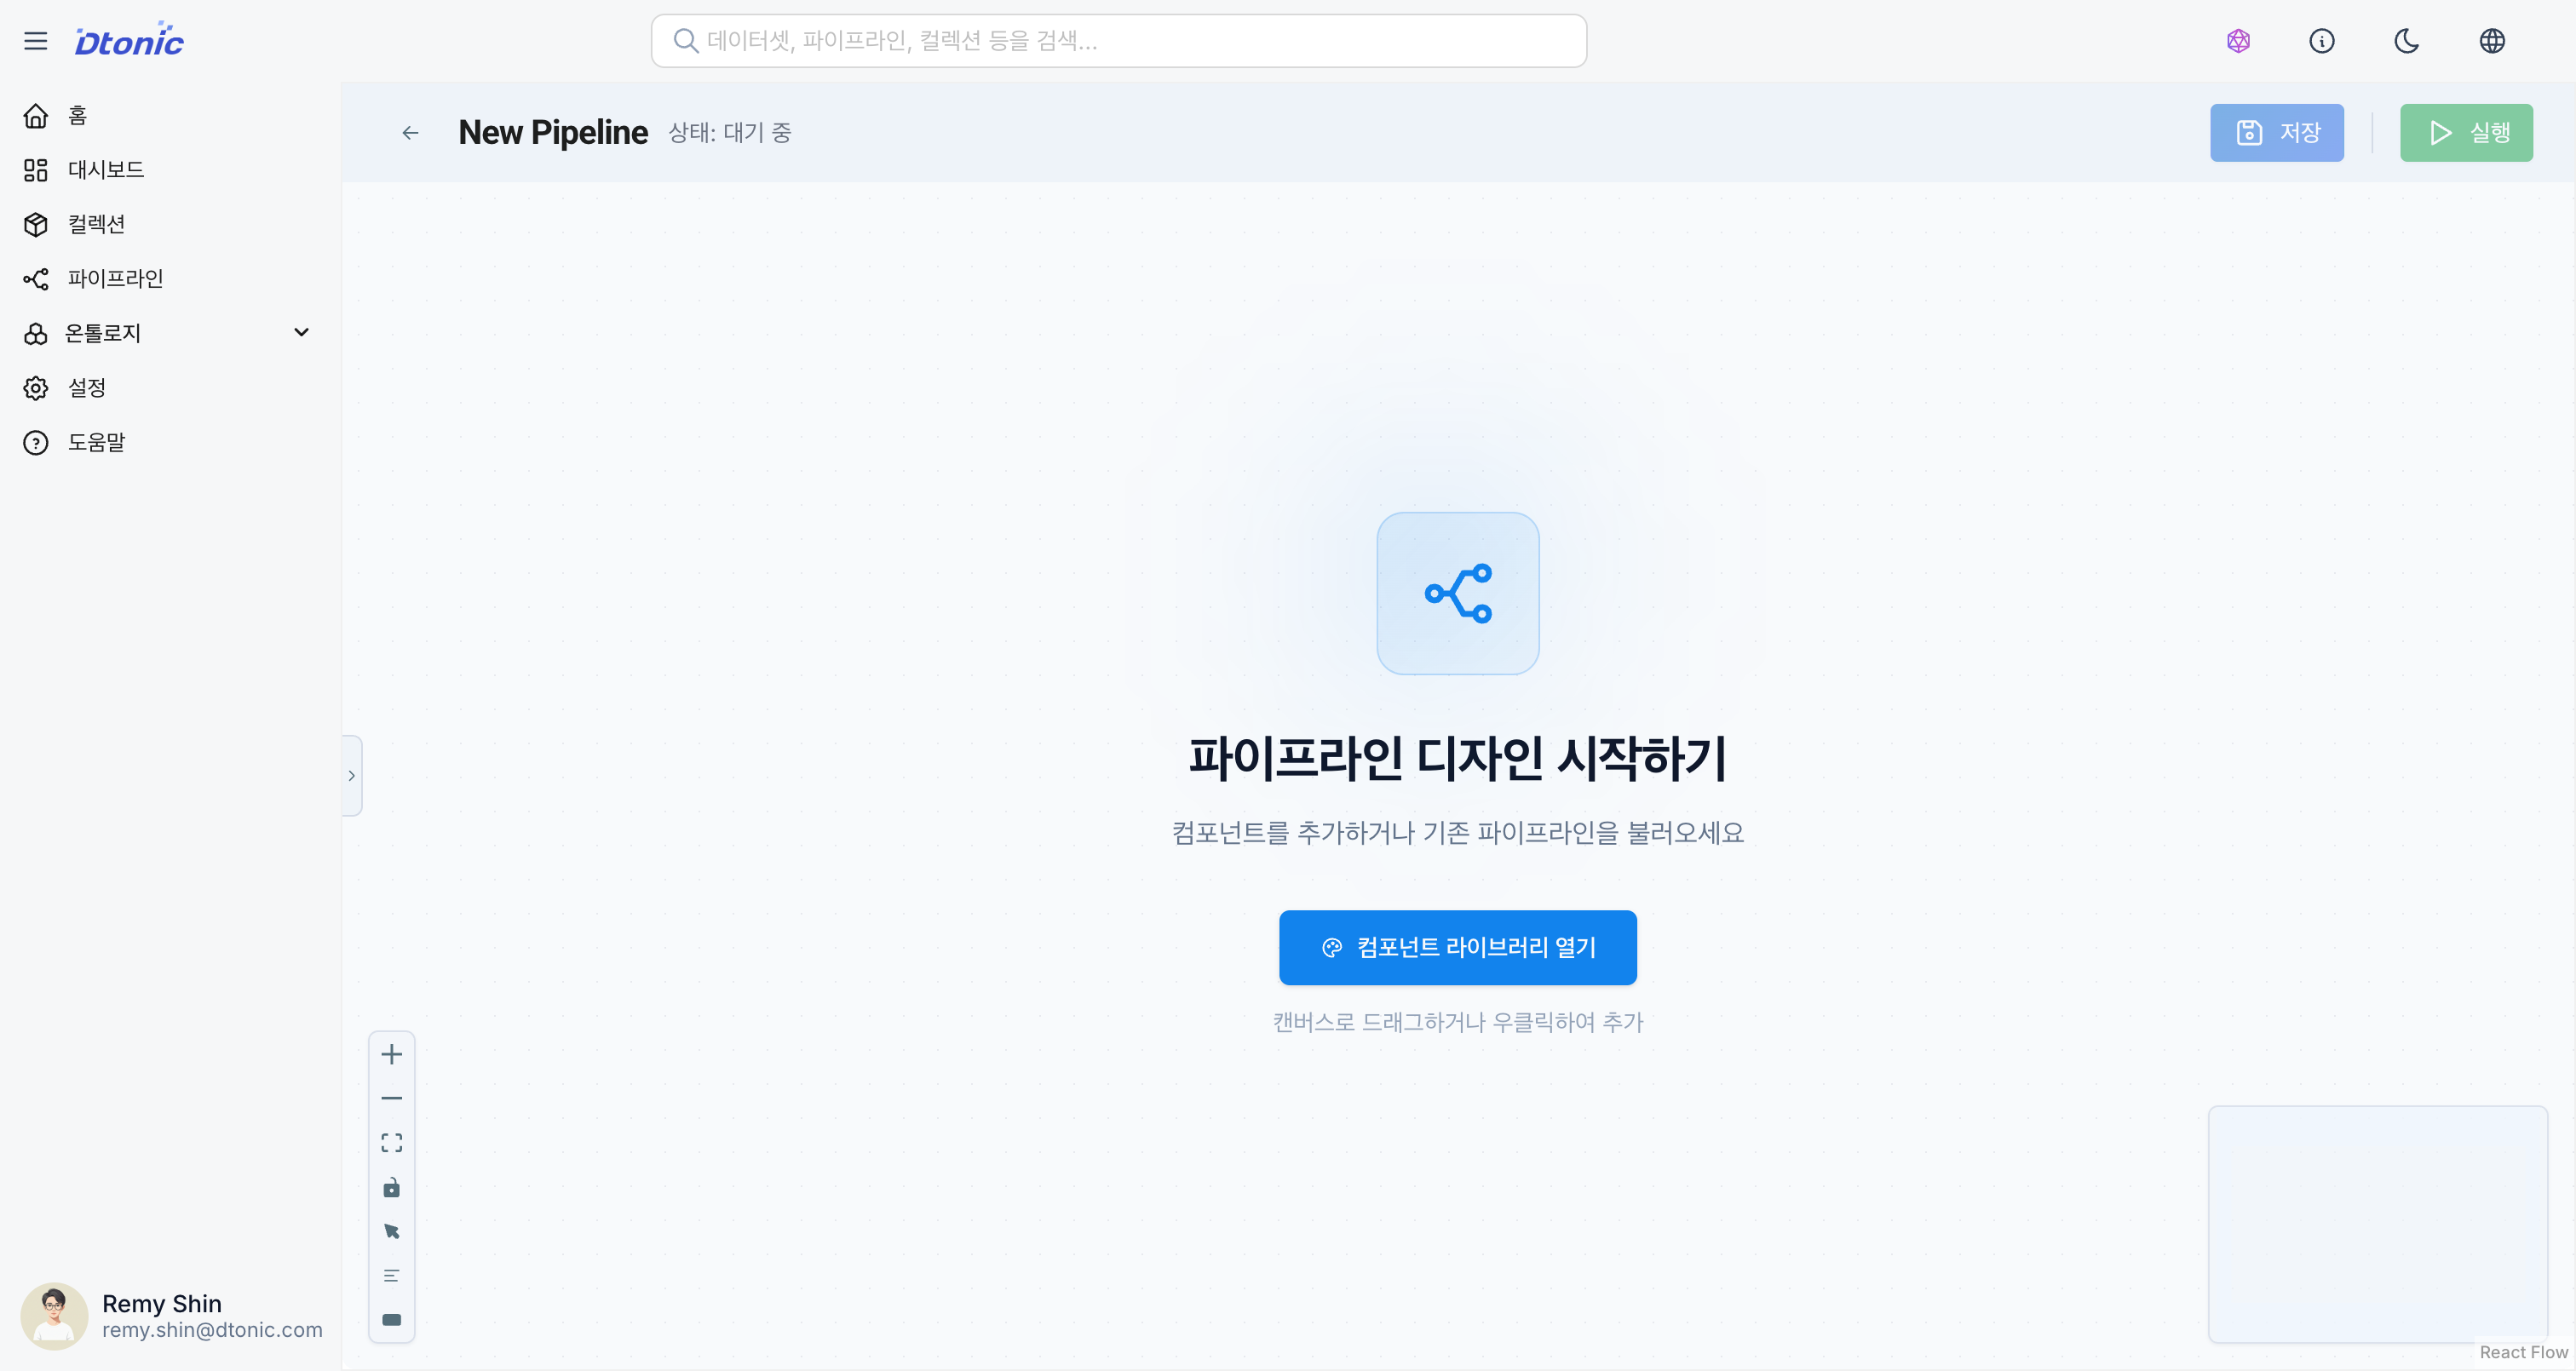
1. Action Bar (Top Toolbar)
Manages overall pipeline control and status.
- Back: Return to the pipeline list.
- Title Editing: Click the pipeline name or alias to edit it.
- Pipeline Type Badge: Indicates whether it is a Batch or Event pipeline.
- Status Display: Shows the current pipeline status (Ready, Running, Failed, etc.).
- Run History: Visualizes recent execution results (success/failure) as a color bar. (Batch pipelines only)
- Save/Run: Save changes or run/stop the pipeline.
- Batch pipeline: Run / Stop buttons
- Event pipeline: Register / Unregister buttons
- Settings: Configure scheduling and execution options.
2. Left Panel: Asset Library
Provides resources that can be added to the pipeline.
- Quick Add: Drag frequently used nodes (Delta Lake, Kafka, Python, SQL, etc.) directly onto the canvas.
- Collections: Find and reuse existing datasets or code saved in your collections.
- Search: Quickly find the assets you need.
3. Main Canvas
The workspace for visually designing workflows.
- Node Placement: Drag and drop nodes and freely adjust their positions.
- Connections: Drag from node handles to connect data flows.
- Minimap: View and navigate the overall structure from the bottom-right corner.
- Controls: Access zoom in/out, pan/select mode toggle, and auto-layout features from the bottom-left corner.
4. Right Panel: Inspector
Configure detailed properties of the selected node. The available tabs vary by node type.
Code Node:
| Tab | Description |
|---|---|
| Overview | Basic information such as node name and description |
| Code | Write scripts using the code editor (Monaco Editor) |
| Options | Manage input/output connections, write mode, and execution options |
| History | View batch execution history |
Dataset Node:
| Tab | Description |
|---|---|
| Overview | Basic information such as node name and description |
| Schema | View and edit the dataset schema |
| Data | Data preview |
Keyboard Shortcuts
Keyboard shortcuts are available for efficient work. Press the ? key to view the full list.
| Shortcut | Function |
|---|---|
Delete / Backspace | Delete selected node/edge |
Ctrl(Cmd) + S | Save |
Ctrl(Cmd) + D | Duplicate selected node |
Ctrl(Cmd) + R | Run pipeline |
Ctrl(Cmd) + L | Auto layout |
Ctrl(Cmd) + A | Select all |
Ctrl(Cmd) + Shift + D | Add dataset node |
Ctrl(Cmd) + Shift + C | Add code node |
Esc | Deselect / Close inspector |
? | Shortcut help |